TAO Community Edition: Platform Installation Guide
How to install and start using TAO Community Edition (TAO CE).
Container
TAO CE supports deploying its resources as a container (using Docker) for local development and evaluation.
Prerequisites
Install Docker. Visit Get Docker to install Docker for your environment.
If using Docker Desktop, make sure to allocate at least 4GB of memory. You can adjust memory usage in Docker Desktop by going to Settings > Resources.
Retrieve and deploy the container with TAO CE
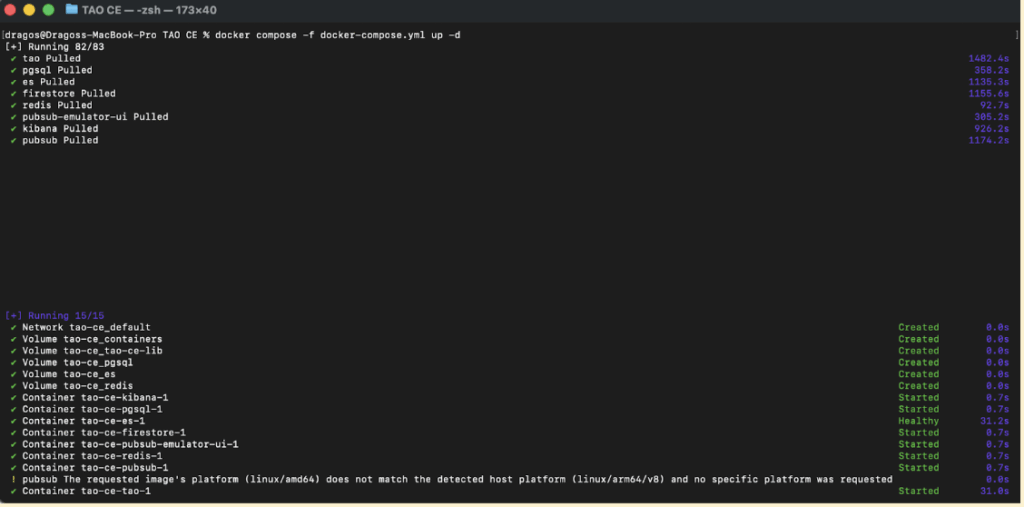
- Pull and configure the required container:
- IMPORTANT: Remove any previous TAO CE containers, volumes, and images from Docker if you have installed TAO CE before.
- Download a .ZIP archive with the
docker-compose.tao-ce.yamlfile:
https://gist.github.com/tao-community-edition/5ac924d5021aa2d7d3635064edc0e752/archive/eb21e720043a3278655516ae1e5993ef6ca2e3f4.zip and unzip it - Open a terminal/shell and go to the folder where you unzipped the file.
- Run this command:
docker compose -f docker-compose.tao-ce.yaml up -d - wait for all volumes to be created and all containers to be started.
- (optional, but recommended)
- On Linux and Mac systems:
edit your /etc/hosts file and add the following line:
0.0.0.0 community.tao.internal - On Windows systems:
Edit your C:\Windows\System32\drivers\etc\hosts file and add the following line:
127.0.0.1 community.tao.internal
- On Linux and Mac systems:
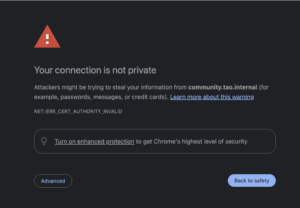
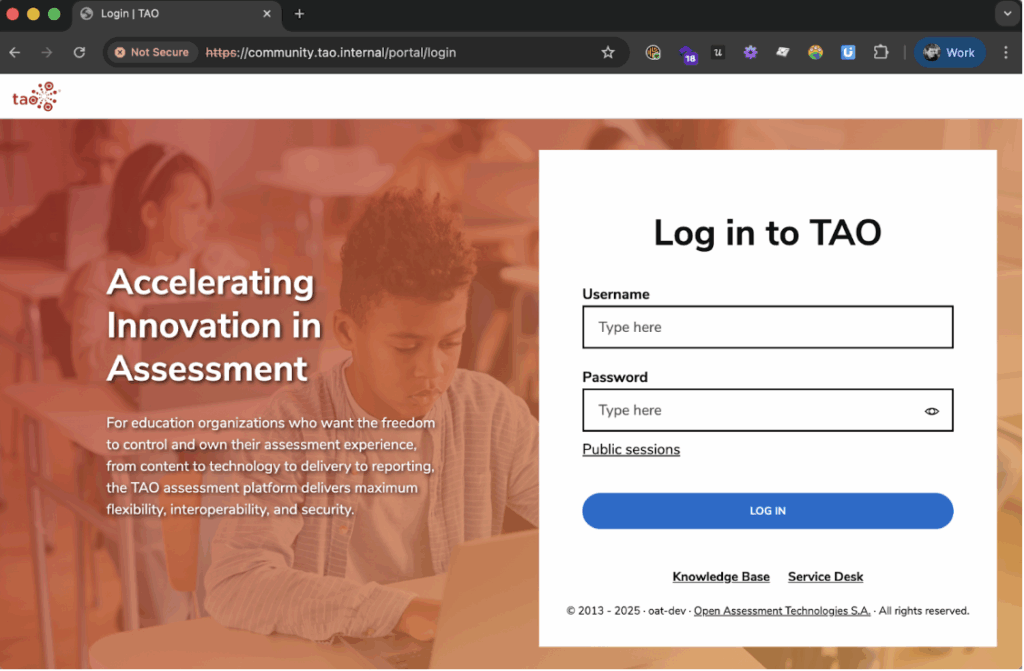
- open your browser and go to https://community.tao.internal/. You may receive a warning about lacking a proper certificate for the page.
- If that happens, click on Advanced (showcased here for the Chrome browser)
-
Then override the warning and Proceed to community.tao.internal
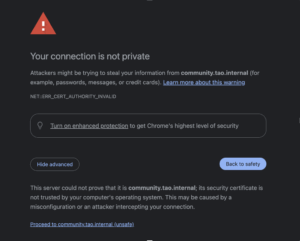
- If that happens, click on Advanced (showcased here for the Chrome browser)
- you may now login with admin / password
Immediate Action Required: Change Passwords
For security, you must change the default passwords immediately.
Change the Admin Password
- Click your user avatar (top right).
- Under My account, click My user.
- Click Change password.
- Choose a secure password (at least 8 characters, with at least one lowercase, one uppercase, and one number or symbol).
- Click Save changes.
Note that you may see a warning that your password is not safe enough, despite following the recommended constraints. You can ignore it, as this is a known issue which will be resolved in a future version.
Change Test-Taker Passwords (users: demo01 – demo05, default password: password)
- Go to the Users tile.
- Locate the users with the Test taker role (demo01 – demo05).
- For each user, open the context (hamburger) menu → Edit.
- Click Change password.
- Set a secure password (same criteria as above).
- Click Save changes.
Performance Expectations
- Concurrent Users: The system was successfully tested with 500 concurrent test-takers, with a ramp-up of 25 users per second. All 500 test-takers successfully submitted their tests.
- Login Slowness:
- At 500 concurrent test-takers, significant slowness was observed at login (1-2 minutes), but the test-takers were able to successfully login in the end.
- At 200 concurrent test-takers, login slowness was acceptable (maximum 7 seconds).
What to do next
After installation and password changes, follow these steps to create and deliver a simple test.
Prepare Content (Items and Tests)
- From the Portal, click the Content bank tile.
- Go to the Items tab.
- Create folders and items as needed. Check the User Guide on how to do this.
- Switch to the Tests tab.
- Create a new test. Check the User Guide on how to do this.
- Add the items you created.
- Publish the test as a new delivery by selecting it and clicking Publish.
Check the User Guide on how to do this.
Create a Group
A group is a collection of users, each with their own role. They are typically used to group together test-takers, according to various common criteria, such as belonging to the same classroom.
Steps:
- From the Portal, click on the Groups tile.
- Click Create group.
- Fill in the required field:
- Name
- Switch to the Users subtab and select from the existing list of users those to add in the group as test-takers
- Save the group.
You can read more information about managing groups in the User Guide.
Create a Session
A session connects:
- a Delivery (published test), and
- a Group (test-takers).
Steps:
- From the test authoring area, click the back arrow to return to the Portal.
- Click the Sessions tile.
- Click Create session.
- Fill in the required fields:
- Session name
- Group (you can use the group you created above)
- Delivery (select the delivery you published earlier)
- Save the session.
You can read more information about managing sessions in the User Guide.
Simulate a Test-Taker
- Log out from the admin user.
- For your convenience, several users are already provisioned, to be used as test-takers. Log in as one of the test-taker users whose password you changed (e.g., demo01).
- In the session list, find your newly created session.
- Click Start.
- Take the test to completion.
Evaluate Test Results
- Log out from the test-taker account.
- Log back in as the admin user.
- Go to Sessions.
- Find your session and click Enter session.
- For any test-taker who completed the session, click Review test to see their results.
Other Relevant Resources
Known Issues
The following issues are known in the current TAO CE version (2025.10). They are planned to be addressed in one of the following releases.
| Issue | Workaround / Notes |
|---|---|
| Text-to-speech is not working for the test-taker | No workaround available yet. |
| Usage tab for items is not working | No workaround available yet. |
| Item statistics tab for items is not working | No workaround available yet. |
| Changing the password for the current user throws an error about constraints not being met, despite following the constraints | Ignore the warning, as the password is actually updated successfully if the constraints are met |