Creating a Scoring Project
A Scoring Project provides a way of configuring what is going to be scored and who by, and of monitoring the scoring process. It can contain more than one delivery; it often matches an assessment ‘campaign’.
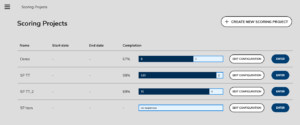
To create a new Scoring Project, go to the Scoring Projects page and follow the steps below.
1. Create a Scoring Project.
To do this, click on the button on the right, labeled ‘Create a new scoring project’, as shown in the image.
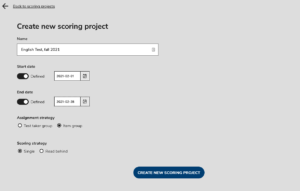
2. On the screen which appears, enter the following information, as in the image below:
- a project name
- the start date and end dates
- an Assignment strategy
- a Scoring strategy.
The start and end dates are optional. A start date can be set for a scoring project which is in the future. An upcoming scoring project will be visible to the scorers and reviewers who’ve been assigned to it, but if the start date is still in the future, they won’t be able to open it until it becomes current. Having a start date in the future can help both project managers with project assignment, and scorers with planning the time they spend on scoring projects.
Once the end date of a scoring project has passed, it is no longer possible to score the responses in it: scorers and reviewers will not be able to load (or refresh) that project page. If a scorer or reviewer is in the middle of scoring a test item when the project expires, a message will be displayed telling them that the project is now inactive. If they click on the Okay button next to the message, they will be taken back to the projects list. In this way the scoring project manager is able to enforce the strict observance of scoring project deadlines.
The Assignment Strategy concerns how scorers (and reviewers) are selected for the project. There are two possible options: by Test-taker group or by Item group. Selecting scorers by Test-taker group means that the scorers chosen will mark the responses of all of the test-takers in that particular group (regardless of subject categories). In other words, using Test-taker group means that a teacher can be assigned as the scorer for a whole classroom. GroupId information is sent to the manual scoring system along with the test-taker’s response. Currently, Test-taker group is only possible when launching tests with LTI: the GroupId needs to be set as the ContextId in the test-taker LTI launch.
Selecting scorers by Item group, on the other hand, means that scorers are chosen on the basis of the subject category of that test item (for example Math or English).
The Scoring Strategy refers to how often test responses are marked. There are two possible options: Single, where a test item is scored by a single scorer, and Read behind. With the latter option, a certain percentage of the scored items are reviewed. When this is selected as a scoring strategy, a window appears entitled ‘Read behind sampling ratio.’ In the drop-down menu you can select the percentage of the responses that should be reviewed.
3. When you have entered the information required, click on the button CREATE NEW SCORING PROJECT at the bottom of the screen.
Only do this when you have entered all the information required.
The new project will appear on the Scoring Projects page (which lists all current scoring projects).
Two tasks remain before the scoring process can begin. Firstly, the TAO delivery (or deliveries) which you wish to be scored in this scoring project needs to be linked to it, and secondly, users (scorers) need to be enrolled (or assigned) to carry out the scoring tasks. See the chapters Linking deliveries to projects and Assigning scorers to projects for more information on how to do this.