Hotspot Interaction
The Hotspot Interaction gives Test-takers the opportunity to demonstrate their knowledge by selecting portions of an image (regions on a map, people in a line-up, etc.).
This interaction is one of a series of Graphic Interactions (the others are covered in their own sections). All graphic interactions can be found in the Graphic Interactions Library.
Once you have generated a new Item, and clicked on Authoring in the Action Bar, follow the steps below to create a new Hotspot interaction:
1. From the Graphic Interactions library near the bottom of the Interactions library on the left, drag the Hotspot icon  onto the blank Item and drop it onto the Canvas.
2. Choose the desired background graphic.
A Resource Manager window will appear with which you can select a background graphic. You can re-use a background already in the resource manager, or you can upload a new one. To select one from the list of previously uploaded graphics, highlight the appropriate background graphic in the resource manager list and click the green Select button. To upload a new one, click on the blue Add file(s) button to browse the files on your computer, and then upload one to the resource manager by clicking the green Upload button.
Highlight the file you have chosen as your background by clicking on it, and it will appear on the right in the preview panel. Click Select in the bottom right of the window to continue.
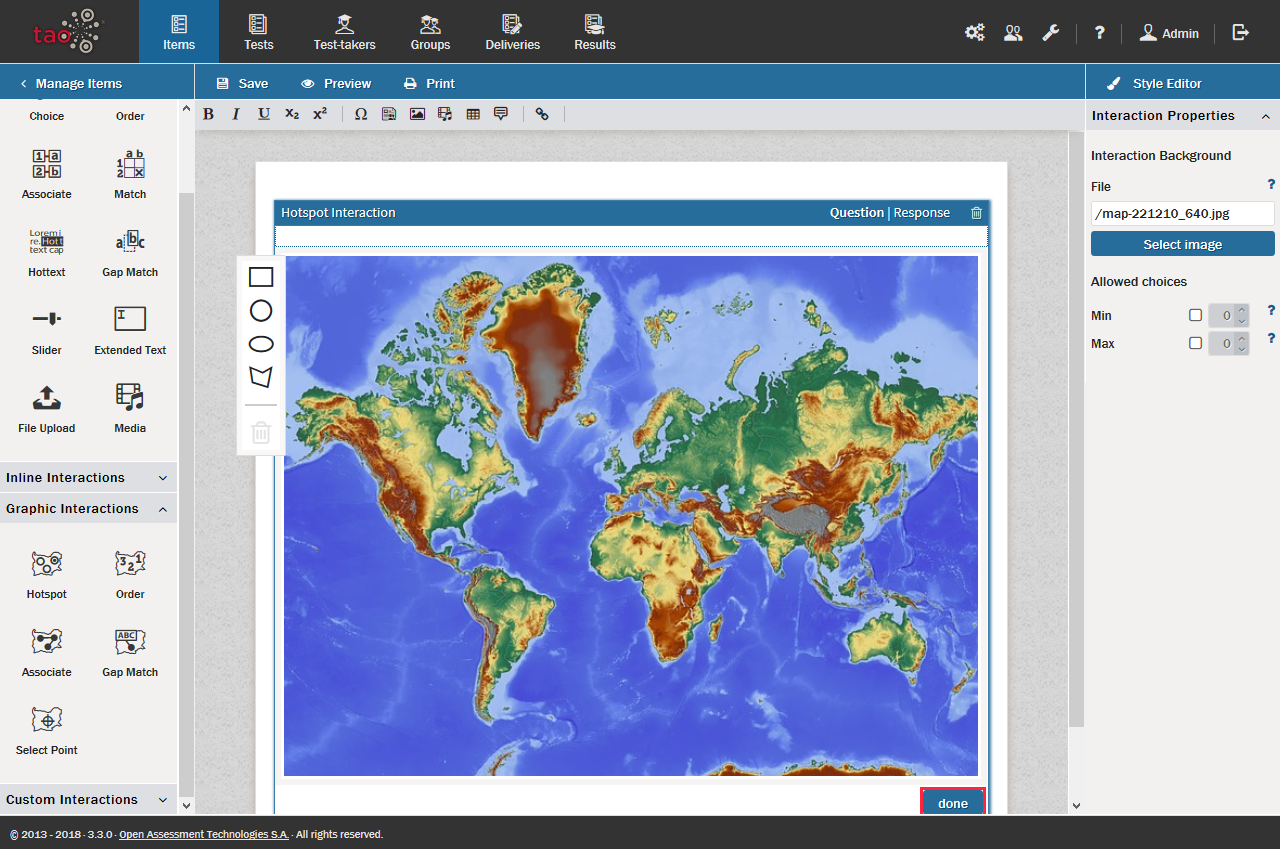
A new authoring window will appear with the background graphic in the center of the canvas. Above the graphic there is a question field. On the left there is an Associable Hotspot Panel for inserting selected shapes that will represent Associable Hotspots into the background graphic (these include four different shapes: rectangle, circle, ellipse, and polygon). Below the Hotspot Panel there is a trash can icon, which allows you to delete a poorly-placed or misshapen Hotspot.
3. Fill in the question field, where it says define prompt.
This should cover such important information as what the background graphic represents, and what the test-taker is supposed to do in this interaction.
Note: See the chapter Word Processing Options for details on text editing options such as using italics or bold text in your item, and inserting features such as shared stimuli or media, tables or formulae.
4. Insert the Associable Hotspots onto the background graphic.
To insert a rectangle, click on one corner and drag it across the intended area the Hotspot is supposed to cover. To insert a circle or ellipse, select its center and drag outward or inward until the Hotspot is the right size. To insert a polygon, begin at one corner, then click on each corner in succession until the Hotspot is complete. You can make all the shapes bigger or smaller (or in the case of polygons change the shape), but if necessary, click on the problem Hotspot, click the trash can to delete it, and then try again.
6. Click Response on the right of the blue interaction header to set the Hotspots in the order required by the question.
This will bring up the same screen, but you can now assign scores to the Hotspots.
By default, a test-taker receives one point per completely correct interaction, so in the case of Hotspot interactions, the test-taker has to select all the correct Hotspots in order for the answer to be considered correct.
See step 7 for other scoring methods.
7. Complete optional configuration of response if required.
You can choose to configure the interaction response in the following ways:
- give partial credit for partially correct answers
- insert modal feedback
These options are available in the Response Properties Panel on the right. See the section Configuring Interactions for details.
8. Click the blue Done button. Your hotspot interaction is now complete.
You can now preview and test-run your interaction by following the instructions given in Steps 5 and 6 in Creating a Test Item.