Creating Test-takers
Test-Takers are individuals who will take assessments assembled by TAO. These are typically registered students in a given class, but test-takers can be place-holder profiles for an instructor or test administrator to trial a Test.
Now, let’s walk through the steps of creating a test-taker.
1. Click on the Test-takers icon in the Assessment Builder Bar.
This will take you to the Test-takers page, and will show the last test-taker profile which you, or the user before you, created. On the left-hand side of your screen you will see the Test-taker Library of existing test-takers. The last test-taker which was created will be highlighted in the library. In this tour, however, you will create a new test-taker.
2. Click on the New test-taker icon in the button bank under the library to create a new test-taker profile.

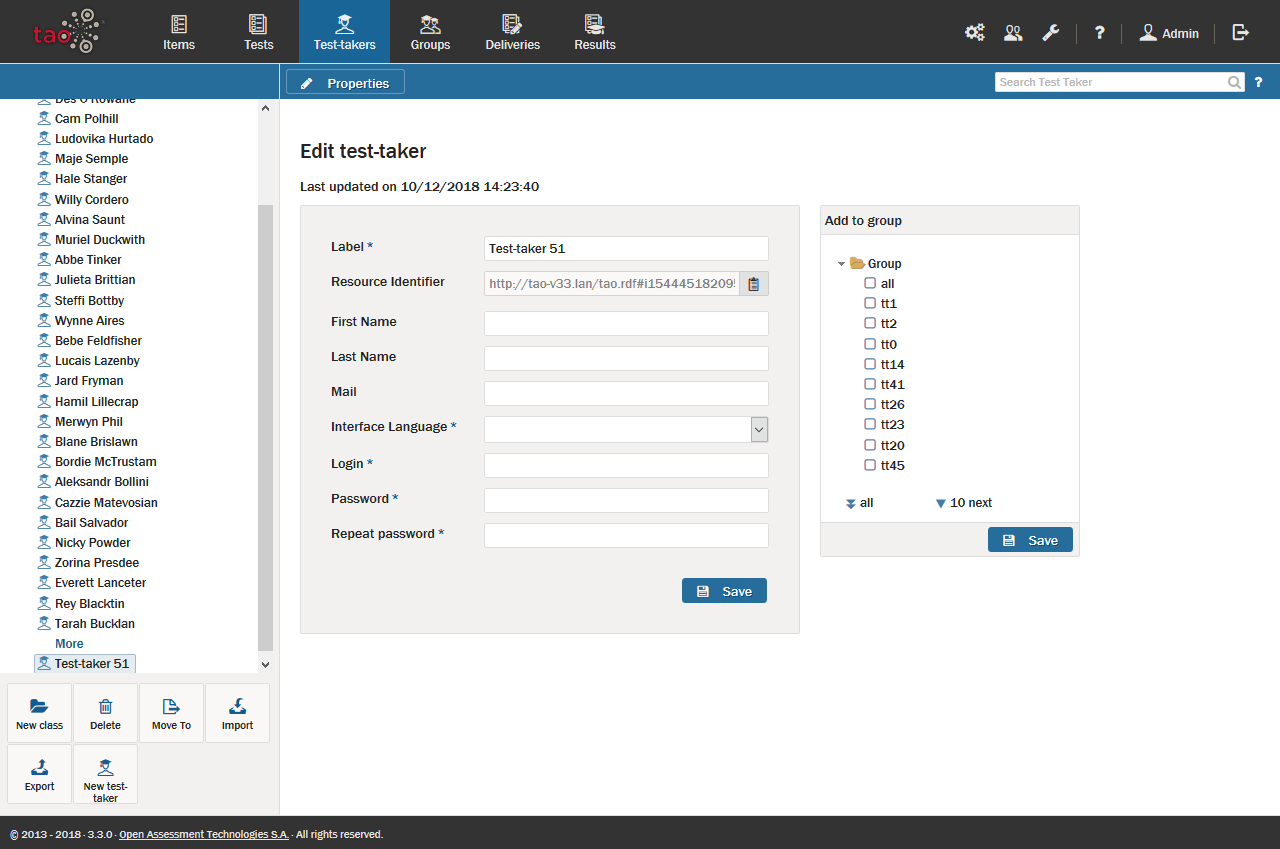
This brings up a dialog box entitled Edit Test-taker.
Note: To create a new test-taker profile in a different folder, select the desired folder in the Library, and then click on the New Test-Taker icon in the button bank. To create a new folder (in TAO these represent new classes), click on New class in the button bank, and then give it a label. Highlight where to put the new folder relating to the new class.
3. Enter the personal details of the new test-taker.
Give them a login (which must be unique) and a password.
Enter a profile name for the test-taker in the Label field. This can be any form of useful identifier (it can, but does not have to be, the test-taker’s name). An address may be entered in the Mail field, for communication with the test-taker.
4. Select an Interface language from the pull-down menu.
The language you select as the interface language determines the language of the assessment environment in which tests are delivered to that test-taker. For example, if the interface language chosen is a right-to-left (RTL) language – such as Arabic or Hebrew – then the whole environment will appear in that language and in RTL mode when that test-taker takes a test. This includes the navigation bar as well all instructions and messages given to the test-taker during the test (such as modal feedback, and the information in the review panel).
5. Save the new test-taker.
When you have filled in the fields described in the last two steps, click the blue Save button.
6. Place the test-taker in a Group
This can also be done from within the Groups section, but for convenience, it is possible to select an existing group in the Add to group canvas on the right, and associate the test-taker with that group by checking the box next to the desired group. Click the blue Save button at the bottom of the canvas to complete the procedure.
